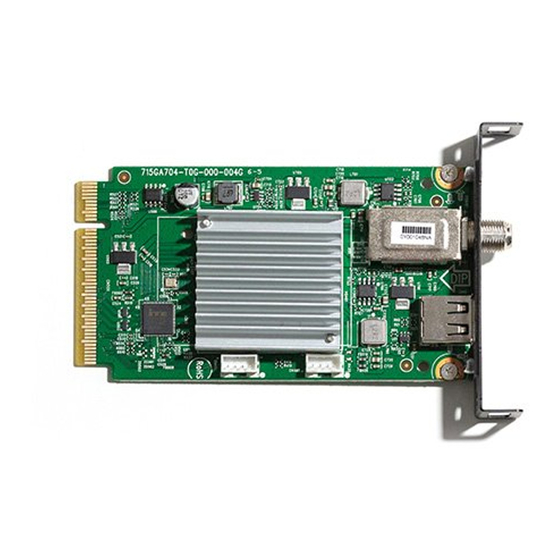
Summary of Contents for NEC DS1-TM01
- Page 1 User's Manual Manuel Utilisateur Manual del usuario Tuner Module DS1-TM01 English Français Español...
-
Page 2: Table Of Contents
Table of contents Important Information ······························································································English-2 Supplier's Declaration of Conformity ······································································English-3 Contents ··················································································································English-4 Installation ···············································································································English-5 Part Names ··············································································································English-7 Connections ············································································································English-8 Basic Operation ·······································································································English-9 Navigating The On-Screen Menu ··········································································English-10 Channels Menu ····························································································English-10 Setup Menu ··································································································English-10 Troubleshooting ·····································································································English-12 Specifications ········································································································English-13 English-1... -
Page 3: Important Information
Important Information Refer to the “Important Information” and “Recommended Use & Maintenance” of the LCD Monitor in the User’s Manual for notes on handling. Safety Precautions and Maintenance FOR OPTIMUM PERFORMANCE, PLEASE NOTE THE FOLLOWING WHEN SETTING UP AND USING THE TUNER MODULE: About the Symbols To ensure safe and proper use of the product, this manual uses a number of symbols to prevent injury to you and others as well as damage to property. -
Page 4: Supplier's Declaration Of Conformity
The Federal Communications Commission does not allow any modifications or changes to the unit EXCEPT those specified by NEC Display Solutions of America, Inc. in this manual. Failure to comply with this government regulation could void your right to operate this equipment. -
Page 5: Contents
Cable-Compatible Analog and Digital Television Receiving Apparatus — Appareil de réception de télévision analogique et numérique câblocompatible, Canada BETS-7 / NTMR-7. Manufactured under license from Dolby Laboratories. Dolby, Dolby Audio, and the double-D symbol are trademarks of Dolby Laboratories. Contents Setup Manual DS1-TM01 Setup Manual English-4... -
Page 6: Installation
Installation Contact your dealer about the compatible monitor models. WARNING: - Before installing or removing this product, disconnect the monitor power cord from the power outlet. - Pay careful attention not to insert foreign objects into the monitor while installing this product. Also, use care not to drop this product and the expansion slot cover. - Page 7 4. Fasten the slot cover (2) to the unused slot with the removed screws. (Figure 4) Use the screw holes shown in the figure when mounting. (Recommended Fasten Force: 60.8 - 82.4N cm). • NOTE: Do not apply a force exceeding the specified torque when tightening the screws. Otherwise, the screw holes may be damaged. Models M431 / M491 / M551 / M651 / MA431 / MA491 / MA551 / P435 / P495 / P555 1.
-
Page 8: Part Names
Part Names Service RF IN 1 Service USB 2.0 Type A port for USB storage device. Insert a USB storage device when you execute Setting Copy function. 2 RF IN (F Type) RF input that connects to your VHF/UHF Antenna or Cable TV Service. English-7... -
Page 9: Connections
Connections NOTE: Do not connect/disconnect cables when turning on the monitor or other external equipment as this may result in a loss of the monitor image. Before making connections: * To protect the external equipment, turn off the main power of the monitor before making connections. * Refer to the user manual included with each separate piece of equipment. Wiring Diagram VHF/UHF Antenna or Cable TV Use 75-Ohm coaxial cable Service RF IN... -
Page 10: Basic Operation
Basic Operation Selecting the Tuner Press the OPTION button on the wireless remote control. Opening the Tuner OSD menu When the input signal of the monitor is “OPTION”, press the OPTION MENU button to open/close the Tuner OSD menu. Wireless Remote Control NOTE: Use your monitor’s wireless remote control. For details about procedures other than those listed below, or if your wireless remote control is different from the picture below, see the monitor’s user’s manual. -
Page 11: Navigating The On-Screen Menu
Navigating The On-Screen Menu Press the “OPTION MENU” button to open and the “EXIT” button to close the main menu of Tuner. Channels Menu Setup Menu The Channels Menu allows you to set your signal The Setup Menu in TV mode is shown below. source options. - Page 12 DS1- TM01 to a USB storage device, and loading (importing) settings’ values from a USB storage to another DS1-TM01. Setting values include the TV channel preset data, allowing users to copy the settings values to other DS1-TM01s instead of having to channel scan on each device.
-
Page 13: Troubleshooting
Troubleshooting Problem Solution No picture, but a message is • Be sure to perform a channel scan before you watch the TV program. displayed. • Check to see if the antenna/cable is properly connected. No picture • Check to make sure that Video Input is set to “OPTION“. •... -
Page 14: Specifications
Specifications Television System NTSC Standard, ATSC Standard (8-VSB, Clear-QAM) Channel Coverage VHF: 2 through 13 UHF: 14 through 69 Cable TV: Mild band (A - 8 through A - 1, A through I), Super band (J through W), Hyper band (AA through ZZ, AAA, BBB), Ultra band (65 through 94, 100 through 125) Interface Antenna / Cable Input...


