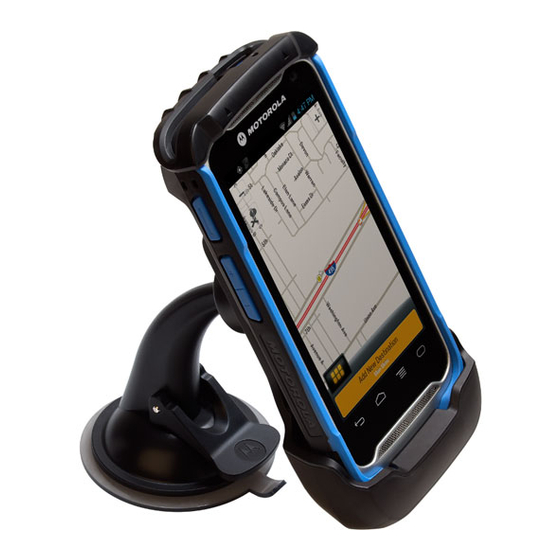
Advertisement
Quick Links
CRD-TC55-VCD1-01
Installation
Install the vehicle mount on a surface of your vehicle that is flat
VEHICLE CRADLE
and free of dirt and oil. Clean the mounting surface with a glass
cleaner and a clean cotton cloth. Install the vehicle mount on the
INSTALLATION GUIDE
windshield or other flat car surface using the supplied disc.
The TC55 can detect when it is inserted into the cradle. Use the
Dock settings to configure the TC55 when in the cradle. See the
TC55 User Guide for more information.
Assembly
1. Remove all parts from plastic bags.
2. Insert the arm ball through the nut and into the socket on the
holder.
3. Secure nut but do not tighten at this time.
4. Remove protective plastic from suction cup.
Windshield Installation
5. Fix the suction cup mount to the selected area with the
suction lever facing up.
Dash Mount Installation
1. Install the disc using the instructions provided with the disc.
2. Remove protective plastic from top of disc.
3. Fix the suction cup mount to the disc with the suction lever
facing you.
6. Flip the lever down to create a vacuum between the suction
cup and the disc.
4. Flip the lever down to create a vacuum between the suction
cup and the disc.
5. Make sure that the suction bond is strong enough before
installing the TC55.
7. Make sure that the suction bond is strong enough before
installing the TC55.
Install the TC55
Connect Power
1. If required, connect the micro USB connector of the auto
The cradle accommodates the TC55 with or without
NOTE
charge cable (VCA400-01R) to the input power port of the
the protective boot and with the 2,940 mAh or 4,410
vehicle cradle.
mAh battery.
2. Use the cable retention feature to secure the cable.
Do not leave the TC55 in direct sunlight for a long
period of time as it may cause the TC55 to exceed
proper operating temperature.
1. Place the TC55 top first into the cradle
2. Push the TC55 back until it snaps into place.
Input Power Port
Auto Charge Cable
3. Connect the other end to the cigarette lighter socket.
The TC55 LED flashes green indicating the TC55 is
charging.
4. Route the auto charger cable so that it does not interfere with
driving.
Remove the TC55
3. Position the TC55 for best viewing.
4. Tighten the nut to lock the cradle in place.
Lift the TC55 up and then remove from the bottom of the cradle.
Regulatory Information
This guide applies to the following Model Number: CRD-TC55-
VCD1.
All Motorola devices are designed to be compliant with rules and
regulations in locations they are sold and will be labeled as
required.
Local language translations are available at the following
website: http://supportcentral.motorolasolutions.com.
Any changes or modifications to Motorola equipment, not
expressly approved by Motorola could void the user's authority
Cable
to operate the equipment.
Retention
For use only with Motorola approved and UL Listed mobile
computers.
Declared maximum operating temperature 50ºC.
Vehicle Installation
IMPORTANT: Before installing or using, check state and local
laws regarding windshield mounting and use of equipment.
For Safe installation
•
Do not put your phone in a location that obstructs the drivers
vision or interferes with the operation of the Vehicle
•
Do not cover an airbag.
RF signals may affect improperly installed or inadequately
shielded electronic systems in motor vehicles (including safety
systems). Check with the manufacturer or its representative
regarding your vehicle. You should also consult the
manufacturer of any equipment that has been added to your
vehicle.
An air bag inflates with great force. DO NOT place objects,
including either installed or portable wireless equipment, in the
area over the air bag or in the air bag deployment area. If in-
vehicle wireless equipment is improperly installed and the air
bag inflates, serious injury could result.
Position your device within easy reach. Be able to access your
device without removing your eyes from the road.
Note: Connection to an alert device that will cause a vehicle
horn to sound or lights to flash, on receipt of a call on public
roads, is not permitted.
Advertisement

Summary of Contents for Motorola CRD-TC55-VCD1-01
- Page 1 Install the vehicle mount on the 3. Fix the suction cup mount to the disc with the suction lever vehicle cradle. All Motorola devices are designed to be compliant with rules and mAh battery. INSTALLATION GUIDE windshield or other flat car surface using the supplied disc.
- Page 2 Suomi: Asiakkaat Euroopan unionin alueella: Kaikki tuotteet on entregarse a Motorola al final de su ciclo de vida para que sean reciclados. help. medical emergencies. Remember, it is a free call on your palautettava kierrätettäväksi Motorola-yhtiöön, kun tuotetta ei enää...


